Makoto Shinkai Style Painting Tutorial
I was involve in an animation project in 2012 and my task was to create background plates for the animation. Anime style background art especially the work of Makoto Shinkai's (新海誠) is one of my main inspiration and reference. Through this animation project, I learned an interesting workflow for painting anime background. So here it is, the Makoto Shinkai style painting tutorial.
Concept and layout
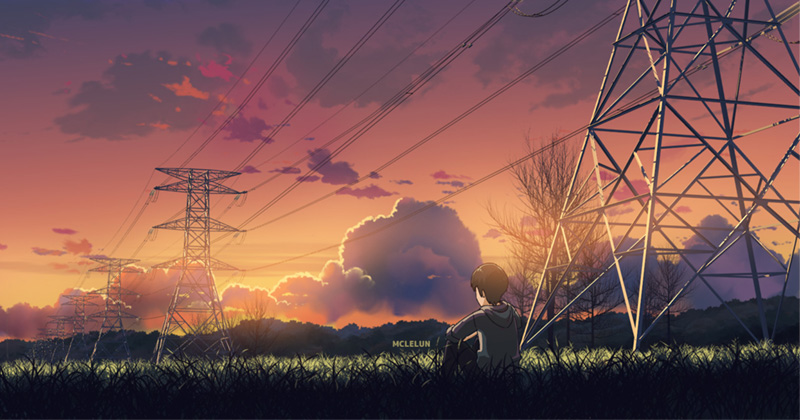
I want to capture the sad and lonely feeling in most Makoto Shinkai's earlier anime. So, I draw someone sitting in a grass field, looking at the distance mountain. Probably thinking about his life or what he is going to eat for dinner later.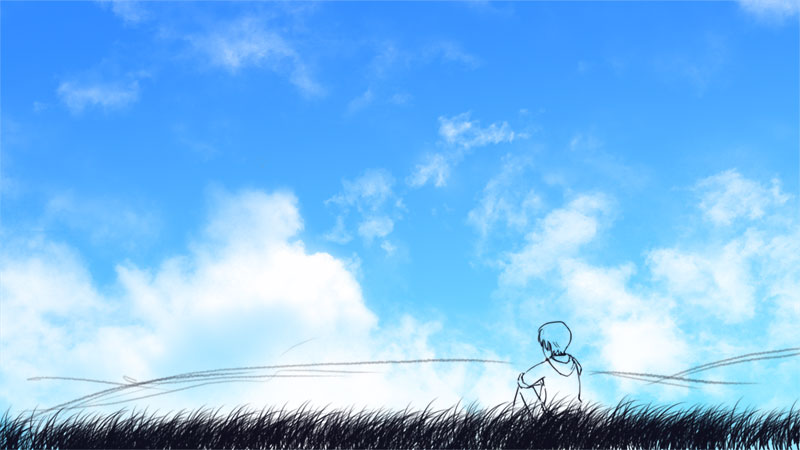
Colour
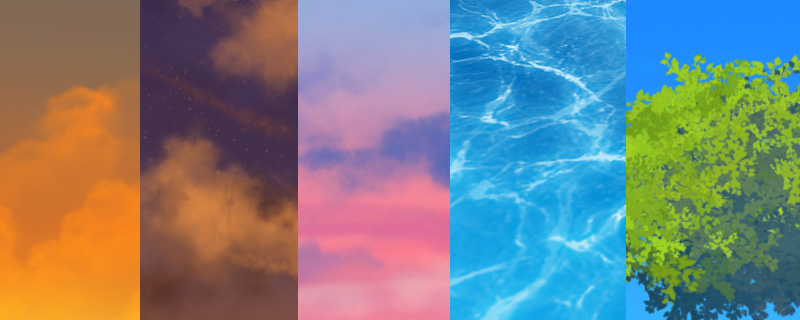
Makoto Shinkai's film always have awesome color choice. This is especially true in his earlier work where the colour palette is even more fancy. Before we do any painting, lets pick a good color combo which can set the mood for your artwork.But what if we are not good at picking color? As a colourblind myself, my advice is to take more photos for reference.
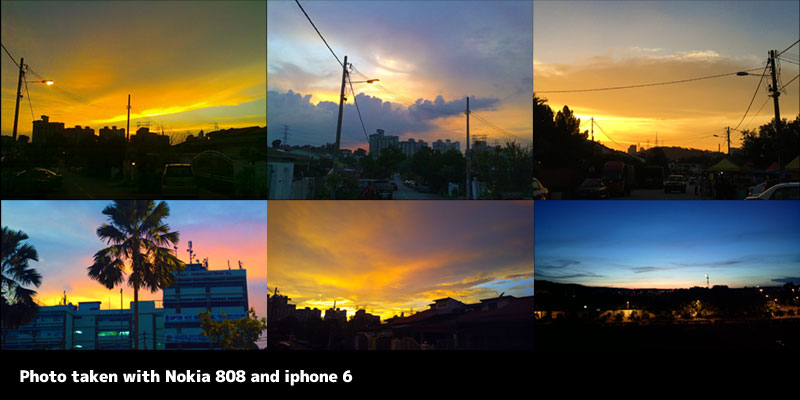
Image above are some sample photos I took with my camera phone. These colors already look quite pretty even without adjustment. So, enjoy the beautiful sunset and take more photos for reference.
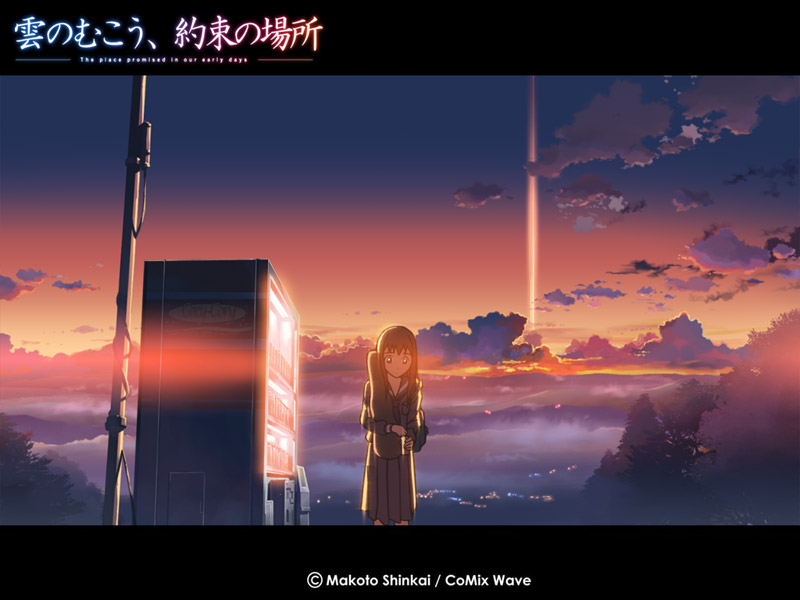
To have more "Makoto Shinkai" feel in your artwork, you can actually reference color from the master himself. I will be doing a sunset settings, so I am using the sunset color from Makoto Shinkai's "The Place Promised in Our Early Days (雲のむこう、約束の場所)".
Tip! Although we can use eyedropper tool to colour pick from reference material, but training your hand or eye to choose the correct colour will be more beneficial in long term.
Sky
The first thing to paint is the base layer which is usually the sky. There are multiple ways of doing the gradient of the sky. You can use the gradient tools, or use a soft round edge brush to paint it manually.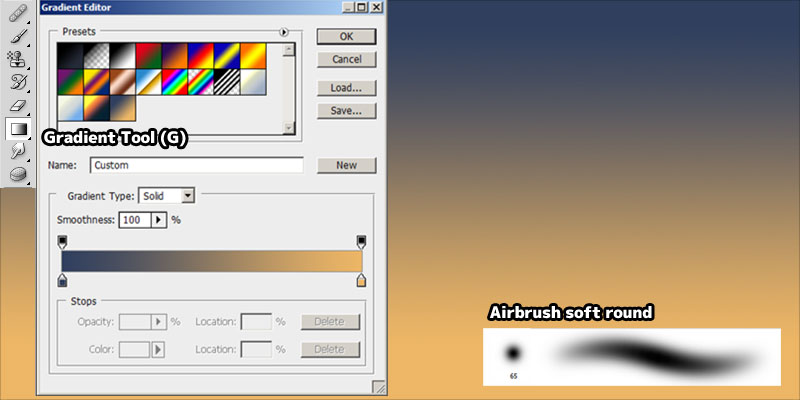
You can add more "points" to the gradient tool instead of just two. Use colours from the colour reference material we prepare earlier.
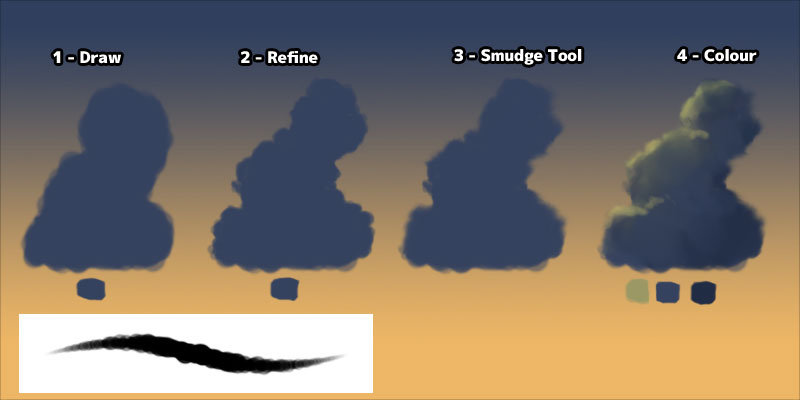
Cloud
Add a new layer for your clouds. We don't want to paint the cloud on the sky layer as it will make adjustment harder. More over, having the clouds in separate layer will make it easier for animation.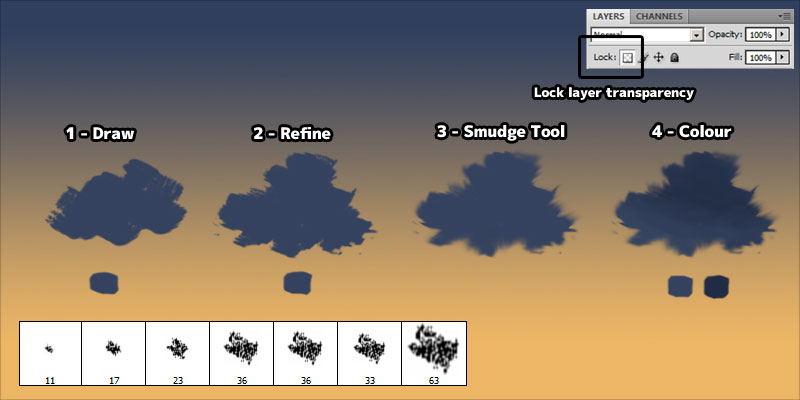
The default Photoshop chalk and charcoal brush are good enough to paint anime style cloud.
- Paint the shape of the cloud.
- Refinethe shape of the cloud. Scale down brush size to paint smaller details on the cloud.
- Using the same brush, we can smudge the edge of cloud slightly.
- Lock and preserve the layer transparency. Enable brush "opacity" and "flow" dynamic control with pen pressure and shade the cloud.
Cumulus cloud near the horizon can be paint with the same method by using a round brush. Enable "Shape Dynamics (size)" and "Scattering" option control with pen pressure.
More Tutorial! You can read my other tutorials on anime cloud painting and look at the brush settings for painting anime cloud.
Using Photo For Cloud
Unfortunately, painting clouds is not really an easy task if we are just starting out. The cloud I did look like a potato rather than a cloud. To have a nice looking cloud, it need to be natural and random. So what can we do that if we are not good at drawing cloud? Again, use photo reference.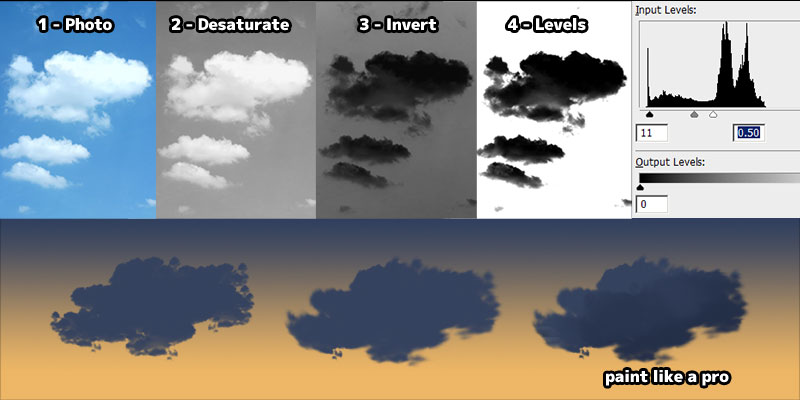
I quickly go through my photo library and found this photo of nice looking clouds I took.
- Original photo.
- Desaturate the photo (CTRL-SHIFT-U).
- Invert the colour (CTRL-I).
- Level adjustment (CTRL-L). We only need to adjust the "Input Level" so clouds become dark (opaque) and background is white (transparent).
- Go to "Edit > Define Brush Preset" to create a custom cloud brush with the greyscale image.
- Choose the shiny new cloud brush, enable "Shape Dynamics Size Jitter", "FlipX Jitter" and "Scattering Jitter" option. Use the new cloud brush and paint like a pro.
Remember do not just take random photos from google images! Always check the copyright status!
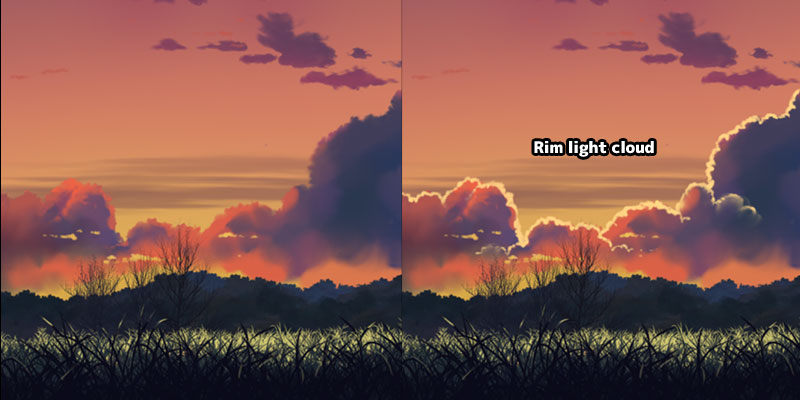
Another small details worth spending time to do is adding rim light around part of clouds where sun lights are shining behind them.
Grass
Painting grass is straight forward too. The default grass brush in Photoshop is already more than enough for this task.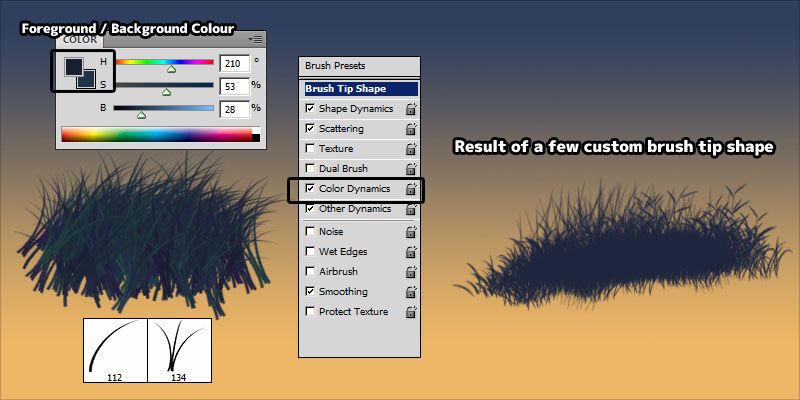
Choose the Photoshop grass brush and set background / foreground colour for "colour dynamics". You can turn this setting off if you want to paint with one colour.
More Tutorial! You can read my other tutorials on Creating custom leaves and grass brush.
Basically, we will divide the grass into multiple layers, such as distance, mid and close up. Distance grass will be paint in smaller scale and faded colour, while nearer grass will be bigger and darker. Using this method, we can show the depth of the artwork easily.
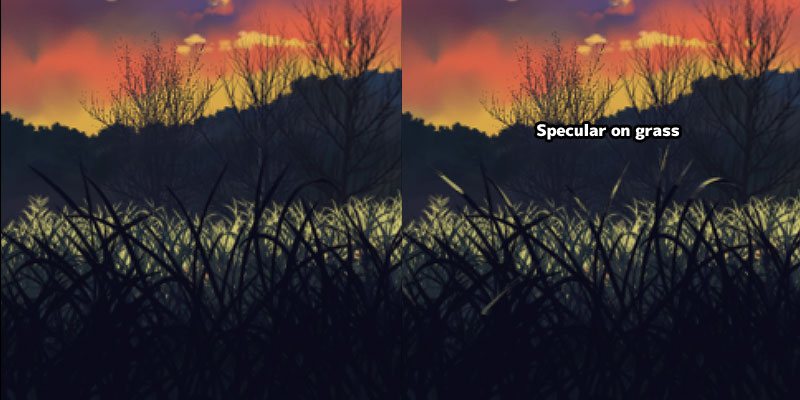
Adding more details to the grass by painting specular to some of the nearer grass.
3D Render
Sometime it is easier to use 3D for certain object in the scene. Drawing detail objects take time and what if we make a mistake? By using 3D, we just move the camera and click render. Then, the 3D software will render an image with alpha transparency and z-depth ready. Ofcourse, learning 3D modeling is not easy either. But it is definately worth it.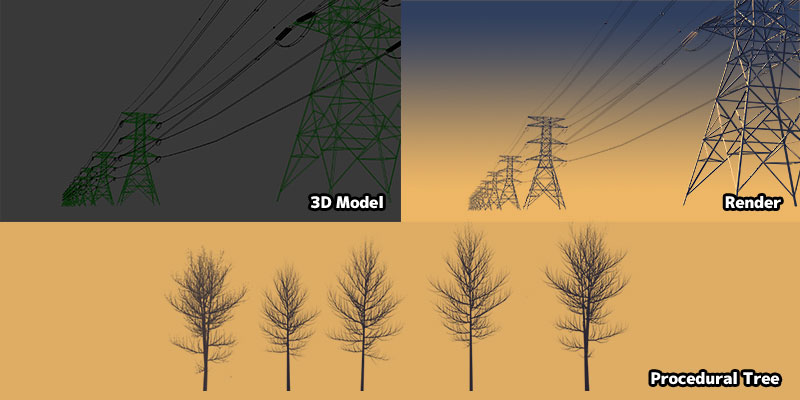
Atmospheric Effect
The final step in painting a Makoto Shinkai style artowrk is adding fog glow to your painting. I would say this area is the main style of Makoto Shinkai earlier work.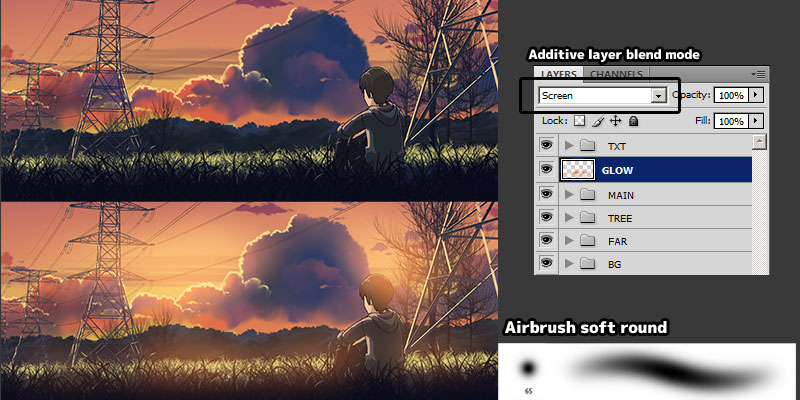
- Add a new layer, change the blending more to "screen" or any other additive mode.
- Paint the area where you think it should be glowing with soft edge round brush. In my artwork, I paint it along the horizon, because it is sunset.
- Adjust layer opacity if needed.
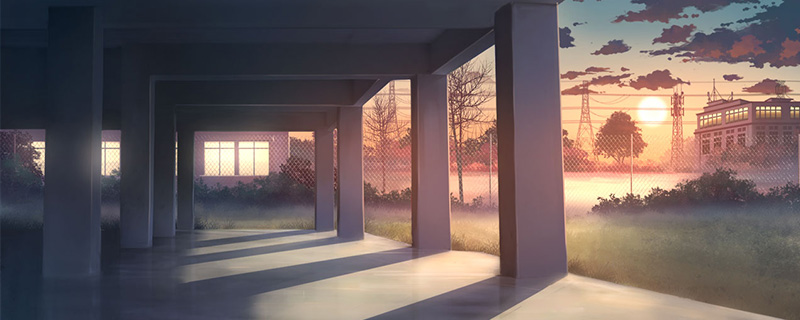
Artwork
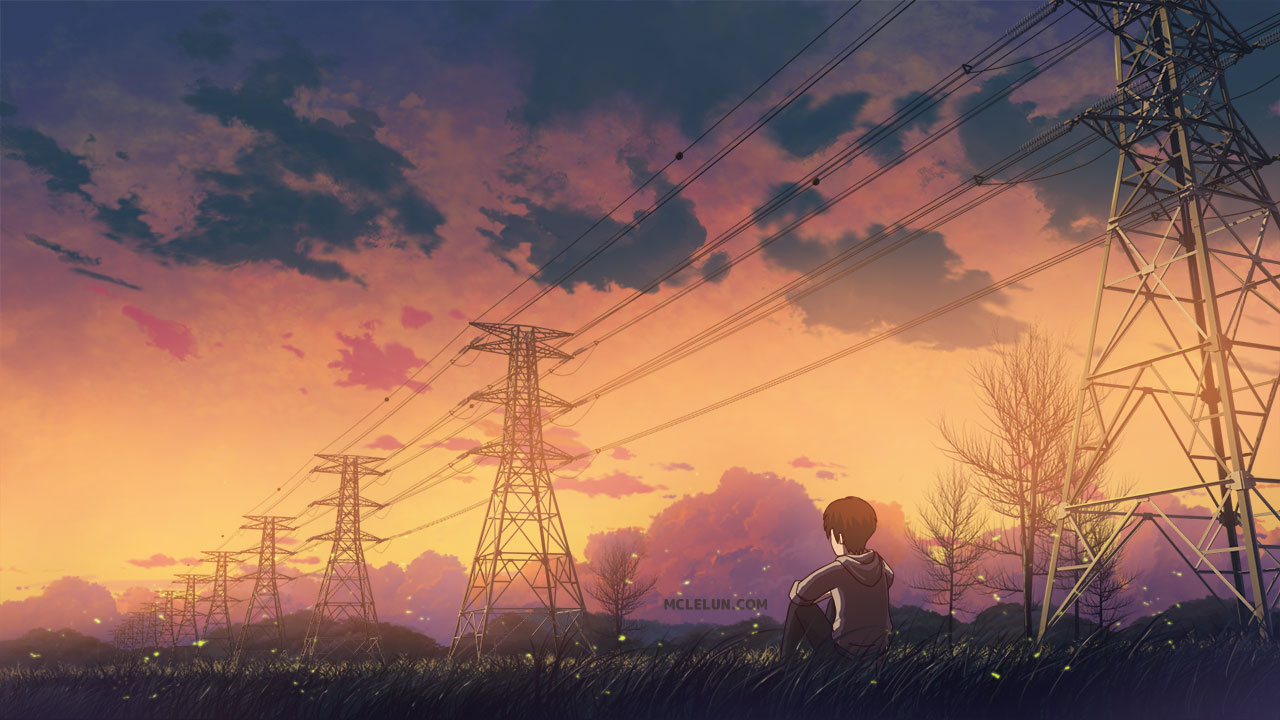
3 years after this blog post, I did a repaint on this artwork. Doesn't seem to have much different when view in thumbnail.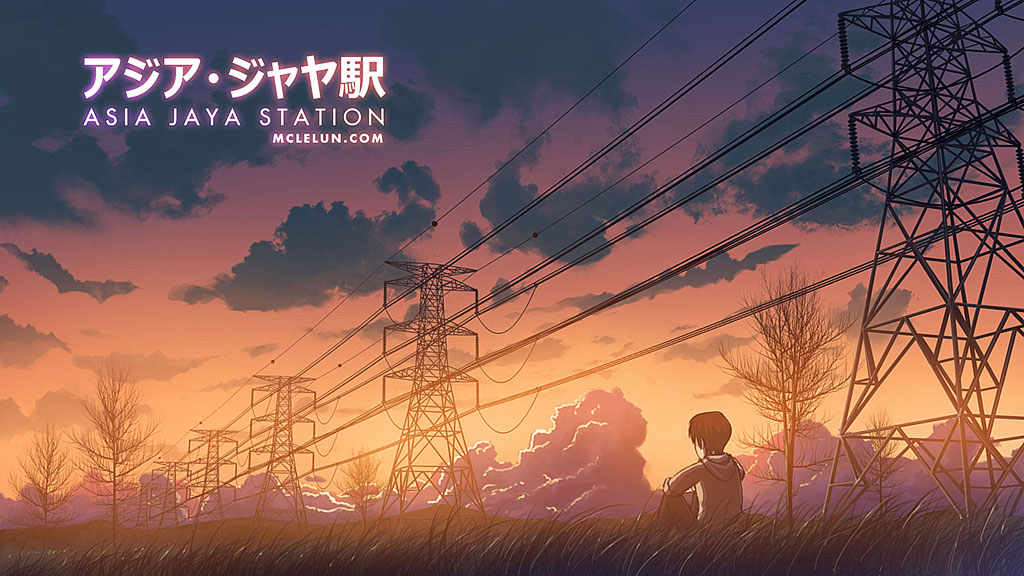
Animation
This is a video I did using the 2012 artwork to show you what animation is possible with a single painting with layers.More Tutorial!
If you enjoy this Makoto Shinkai style anime background tutorial, you might be interest with the following too.Painting Makoto Shinkai style anime background using photo
Reference
DeviantArt AsiaJayaDeviantArt AsiaJaya 2015
DeviantArt AsiaJaya 2017
Pixiv AsiaJaya 2015
Pixiv AsiaJaya 2017
Vimeo Makoto Shinkai Style Painting
Youtube Makoto Shinkai Style Painting
what photoshop did you used? is it cs6?
ReplyDeleteThe pictures for this are gorgeous. Thank you for sharing your process :) How did you animate it at the bottom???
ReplyDelete