Anime Tree Tutorial

This tutorial will discuss in detail on how to paint an anime style tree and foliage based on my observations of trees painting in various anime.
Intro
Anime style background art are usually painted with traditional medium. Those beautiful landscape art we seen in Ghibli's films were painted by Yamamoto Nizou and Oga Kazuo using gouache colour. But as technology improve, more background arts are now being paint digitally such as those in Makoto Shinkai's films.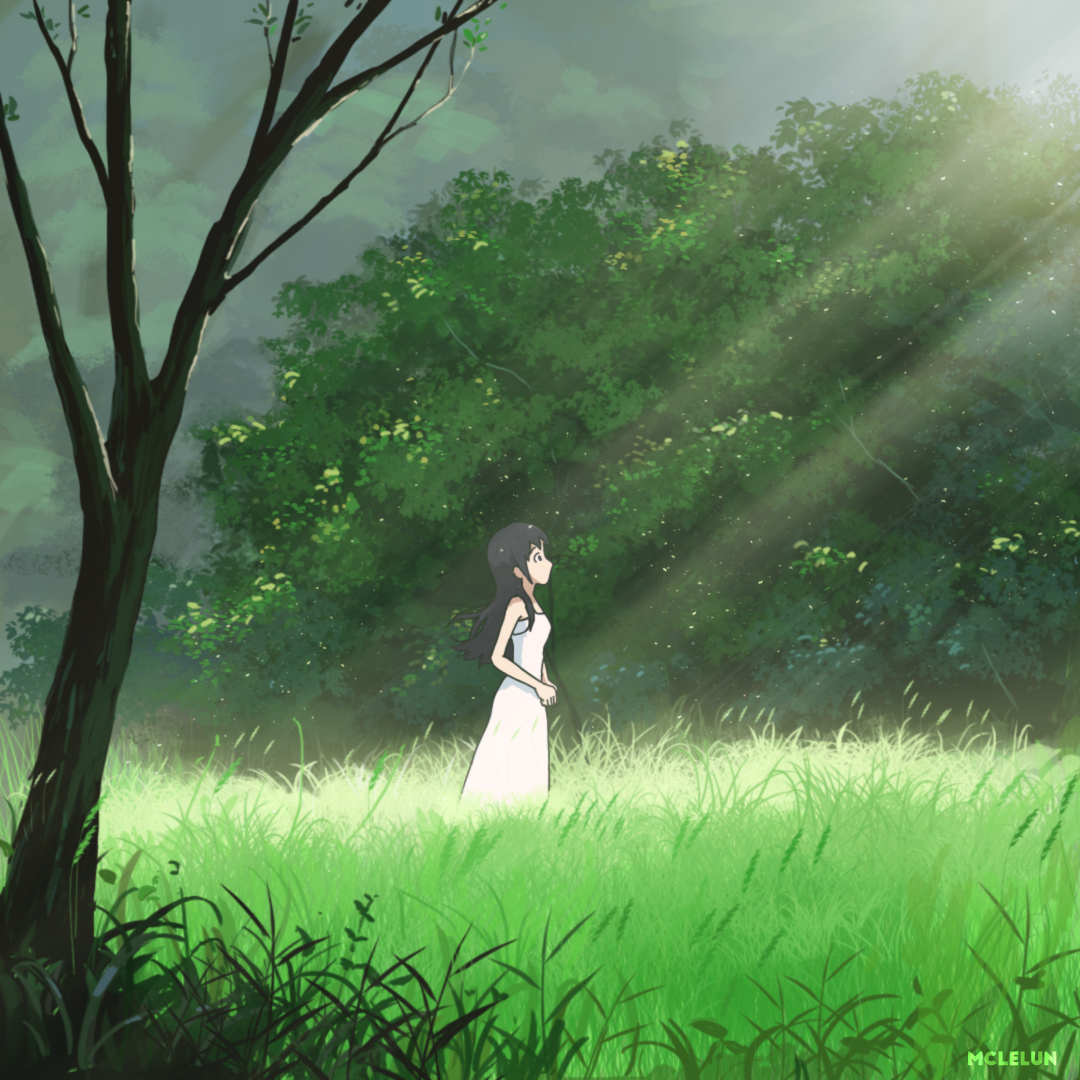
Although we will be painting the trees digitally in this tutorial, but we will try to maintain the traditional painterly look like those we saw in anime. This is what I call the "anime style tree".
Custom Brush of Default Brush?
One of the biggest misconception about painting trees from beginners is the need of custom brush (I must admit I was one of them too). Custom brush while offer easier solution for tree painting, but it will tend to look too "digital" if it is being over use. This is due to the repetitive leaves pattern from the custom brush.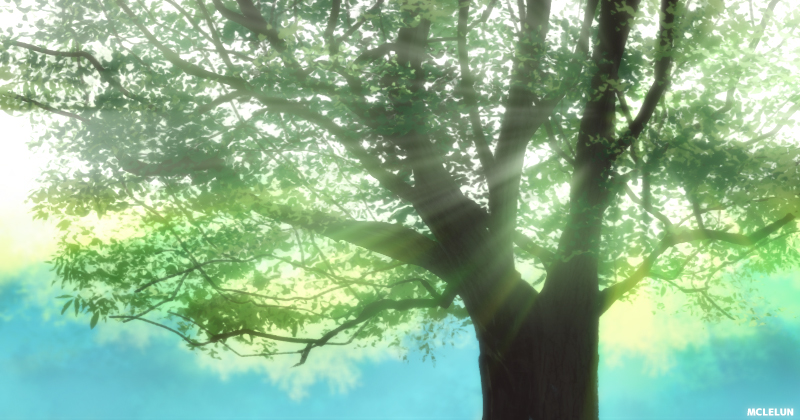
Both default and custom photoshop brush are good for painting trees, and I will talk about both method later. For now, lets create some custom leaves brush and look at some of the good default photoshop brush for tree painting.
Default Brush
Default photoshop brush that are good for painting foliages are Chalk, Charcoal, and Oil Pastel Brush. Personally, I use Oil Pastel Large (63) most of the time. I will discuss further on how to use these default brush to paint leaves later.
Custom Brush
Creating a custom foliage brush in Photoshop is pretty straight forward. Generally, the three most useful brushes to have in your brush library are of leaf, leaves and bush brush.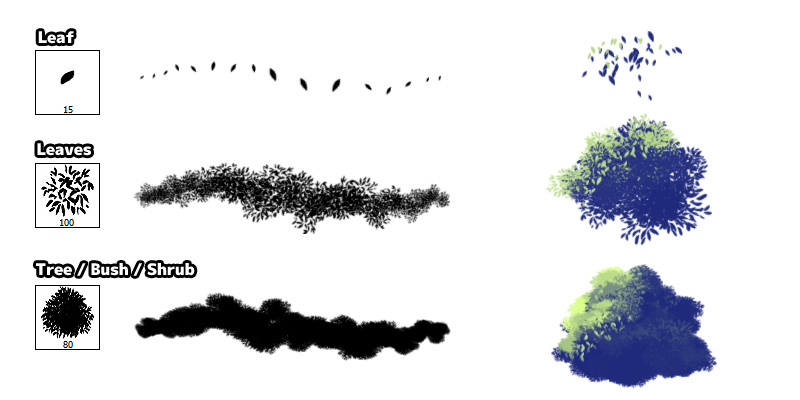
"Leaf brush" can be use to for detailing the trees with individual leaf (usually the brighthest leaf) while "Leaves brush" is use to quickly paint tree contour. "Tree / Bush / Shrub brush" with denser leaves is suitable for painting distance bushes and trees.

Let's create these brush in Photoshop! Please note that all these brushes can use similar settings.
- Draw the custom brush tip shape.
- Go to Edit > Define Brush Preset to create the new brush.
- Select the new brush and adjust brush tip spacing in "Brush Tip Shape". Enable "Shape Dynamics" and "Scattering" option.
- Optional step is to enable "Color Dyamics".
- Size Jitter - Randomise brush tip size. Control with Pen Pressure.
- Minimum Diameter - Minimum brush tip size.
- Angle Jitter - Randomise brush tip rotation.
- Roundness Jitter - Randomise brush tip shape roundness. This will squeeze the tip shape vertically.
- Minimum Roundness - Minimum brush tip shape roundness.
- Scatter - Randomise brush tip location. Enable Both Axes so it scatter on X and Y axis.
- Count - Number of brush tip scatter. Default 1 is good enough
- Foreground/Background Jitter - Randomise brush tip color between foreground and background color. Set it to 0 percent and control with Pen Pressure. Enable Apply Per Tip, if the option is available (Photoshop CC).
- Hue/Saturation/Brightness Jitter - Use a low value to color shift on hue, saturation or brightness.
More info on Creating custom Photoshop leaf and grass brush and Creating custom Medibang Paint leaf and grass brush
Painting Tree Trunk and Branches
With our brushes ready, it is time to paint some trees! We will start by painting the tree trunk, as this will define how tall and wide our tree grows.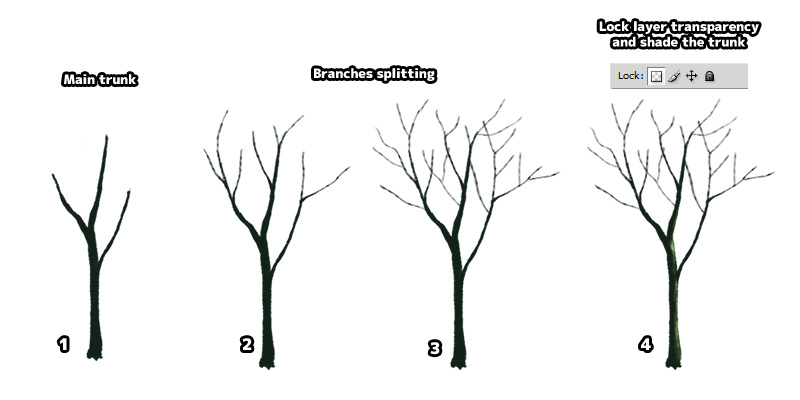
- Choose any brush of your preference and draw the base tree trunk. I am using the default photoshop brush "Oil Pastel Large" for this step.
- Scale down brush size and add in detail for branches.
- Split the branches into another level.
- Lock layer transparency and start shading the tree branches with a brighther shade of colour.
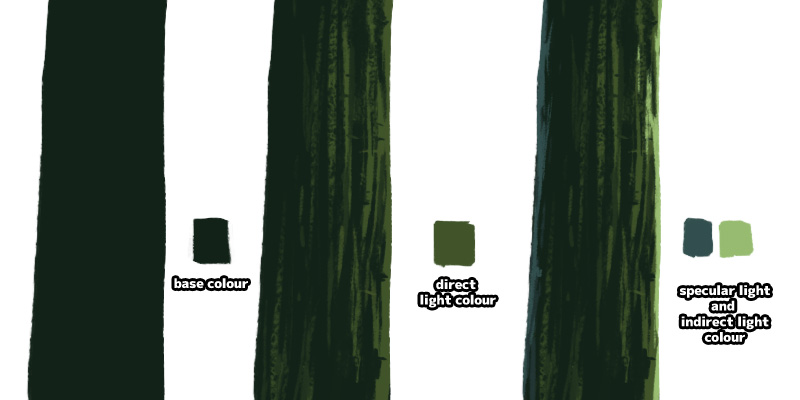
- The base colour for tree trunk and branches.
- Determine light source direction and shade the tree with direct light colour.
- Paint specular light and indirect light colour for the tree.
More tutorial on Painting Tree Trunk.
Painting Tree Leaves with Default Photoshop Brush
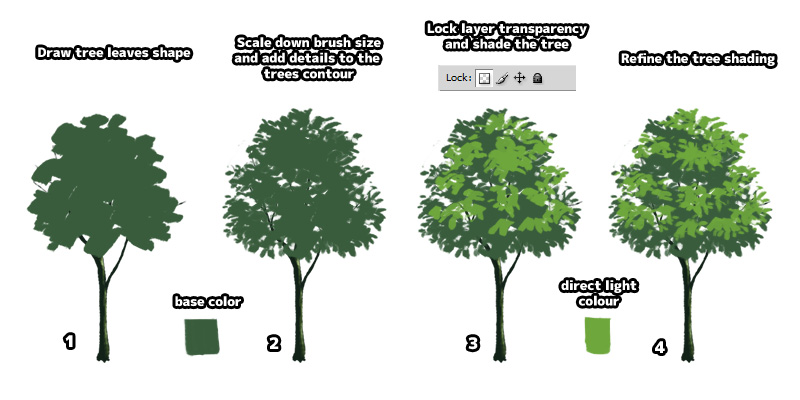
- Choose Chalk, Charcoal, or Oil Pastel Brush in Photoshop. Draw the contour of the tree leaves.
- Scale down brush size and refine the tree edges. Use the same brush to erase and paint. All leaves are draw manually in this step.
- Lock layer transparency and start shading the trees with a lighter colour (direct light).
- Refine the leaf pattern of bright colour leaves.
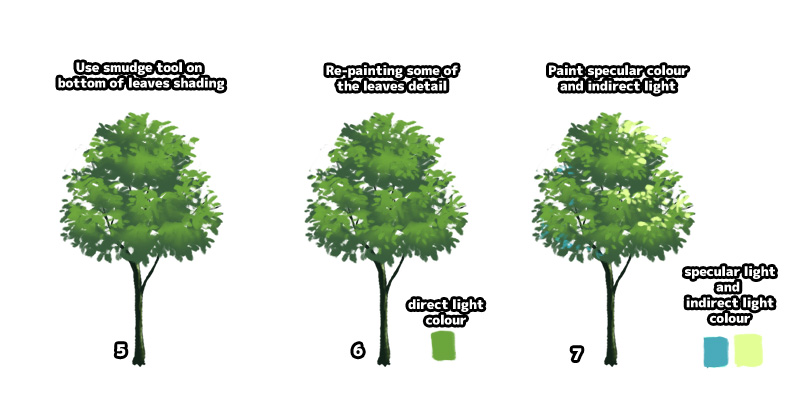
- Use smudge tool to smudge the bottom of those bright colour leaves. This will simulate the feel of wet paint and remove the vector art look.
- Using the direct light colour, re-paint some of the leaves detail which was blur due to smudging.
- Paint specular light and indirect light colour for the tree.
Painting Tree Leaves with Custom Photoshop Brush
The process of tree painting using custom brush are not much different from using default photoshop brush.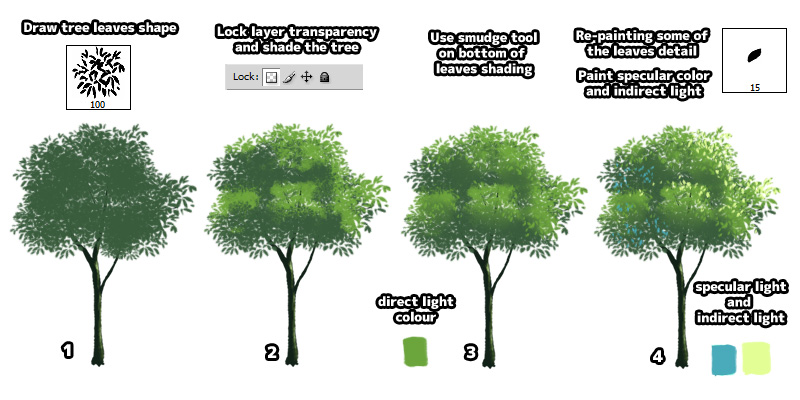
- Choose "Leaves" brush we created earlier, and draw the contour of tree leaves.
- Lock layer transparency and start shading the trees with direct light colour using the same brush.
- Use smudge tool to smudge the bottom of those bright colour leaves. This will simulate the feel of wet paint and remove the vector art look.
- Choose "Leaf" brush. Re-paint some of the leaves detail which was blur due to smudging. Add in specular light and indirect light colour for the tree.
Shading
Some leaves are translucent and some are a bit reflective due to the wax surface. The colours and shade of leaves varies depend on how much light fall on them.
Level of Detail
To ensure our artwork will not be too "noisy" or overcrowded, it is better that we don't paint distance trees with visible leaf pattern.
Detail of tree leaf are leave out from the distance foliage, while tree leaves and twig are clearly visible in close up shot.
Haze
When painting a wide shot scenery artwork, remember that the distance trees will be in blue tint and faded colour due to haze.
Colour Palette
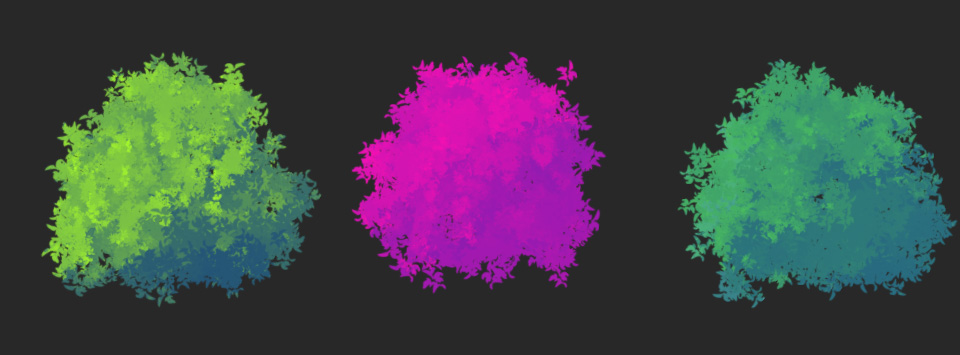
Colours are important in painting anime tree. By changing the colour palette, a single leaves brush can be use to paint different styles of trees.

Top image show a foliage paint with basic colour palette while the bottom one are paint with color palette reference from anime.

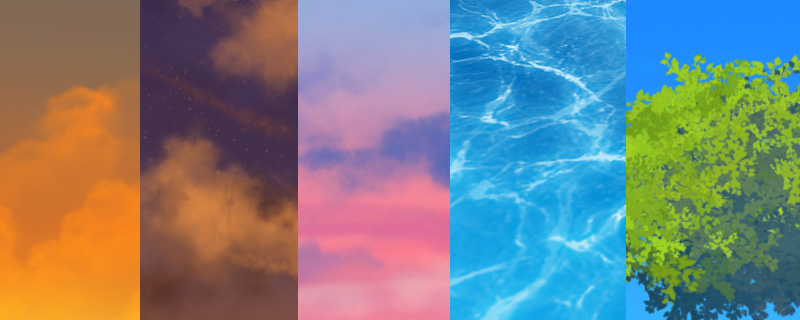
Colours can be use to determine season and time as well. Orange, red, yellow are use for autumn season. Light gray, blue are use for snow flakes on tree. Pink are use for cherry blossom.

For night scene, use darker shade of monotone colour palette. Since we are painting anime style trees, why not make it glow? I bet I saw this glowing sakura or willow tree in some anime before.
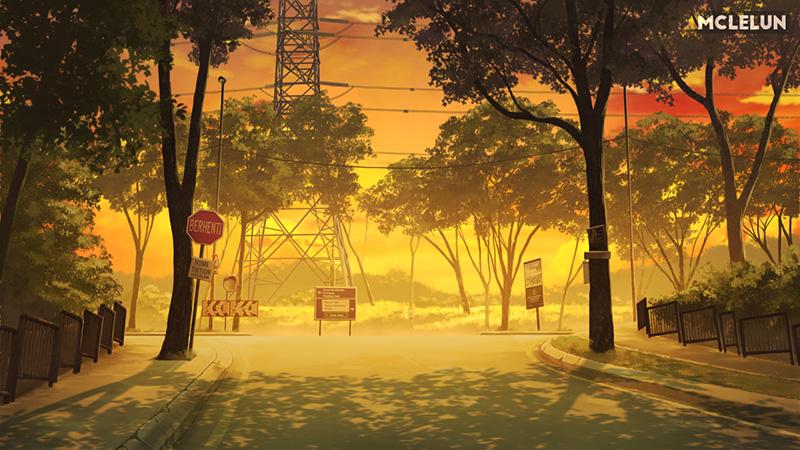
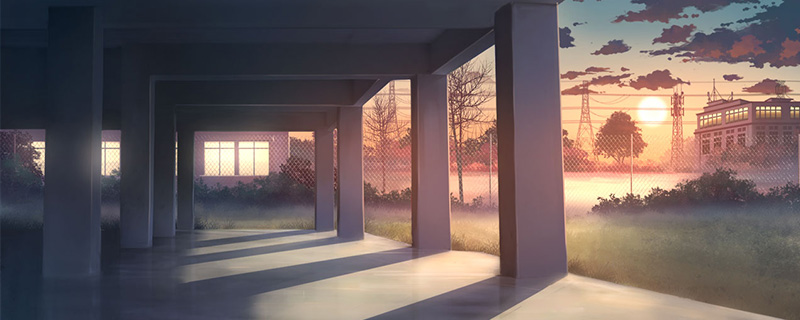
Night and Evening
Sometime, we can paint the trees with just one shade of colour. This is especially true for evening or night theme painting.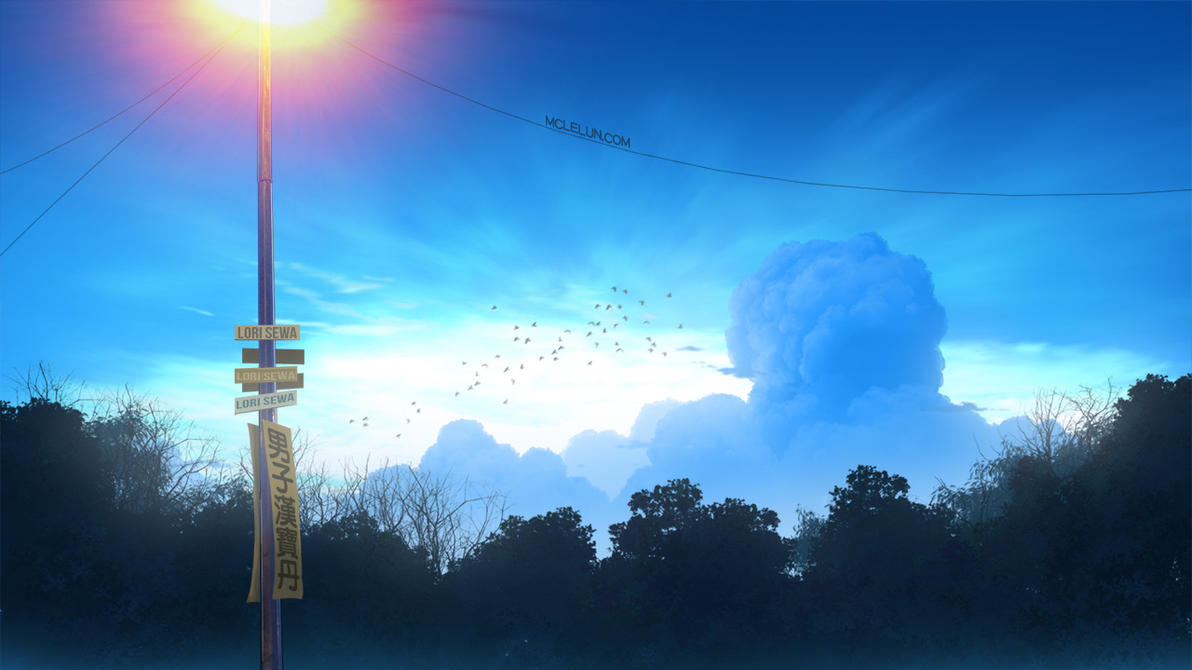
During the night, tree colours are more monotonous as it only receive light from the moon. This is same for a warm colour sunset where the whole scene are tint with orange, red, yellow colour.

And this mark the end of my anime tree painting tutorial. Just remember, practice makes perfect and keep on painting happy little trees like Bob Ross always said.
awesome thanks!!
ReplyDeletethis is magical! I appreciate so much, thank you <3 much love.
ReplyDeleteEspectacular estudio-tutorial, muchas gracias
ReplyDeleteWalaupun bhs Inggris saya masih bisa mengerti karena tutorialnya bagus dalam penulisannya 👍
ReplyDelete