Anime Background Tutorial
I blog about my research on Makoto Shinkai's (新海誠) style background painting and seems like lots of Shinkai fans love it. So, here is a new writeup. Hopefully it will be more useful than the old tutorial.
Heads up! I suffer from partial colorblindness and never went to any art school. Technique and theory in this tutorial might not be correct. This is also not an in-depth step by step tutorial and it is meant for people that have some knowledge on Photoshop.
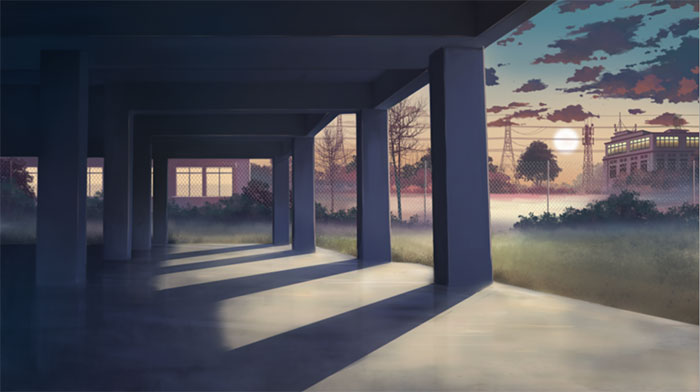
Original Photo
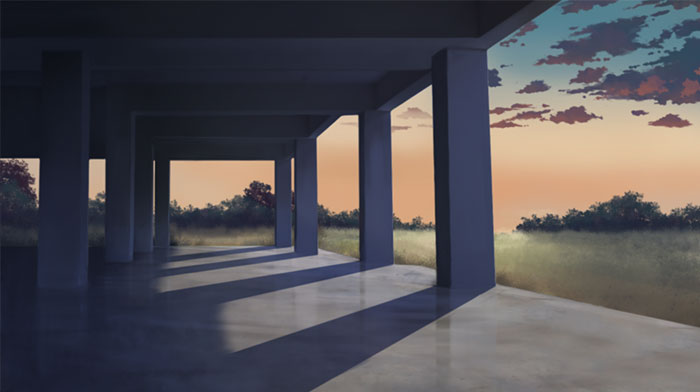
Browsing through my photo gallery, I found this hallway photo which is perfect for showing how Makoto Shinkai using layers for shadow.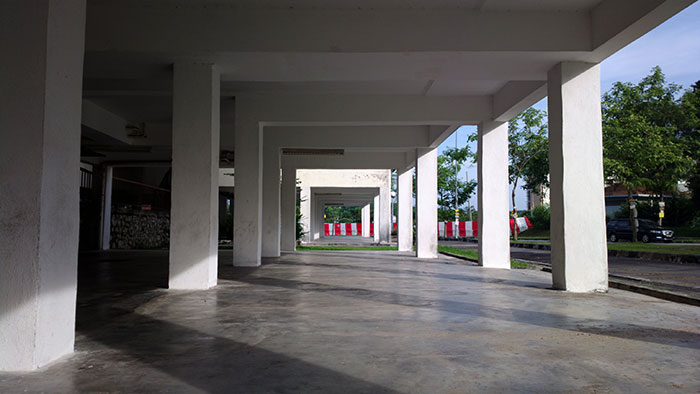
Separating The Foreground From Background
The first thing I usually do is to remove the background (sky) from the foreground object. Depending on your artwork, you might need to mask different objects into different layers. This will greatly help on painting and animation later on.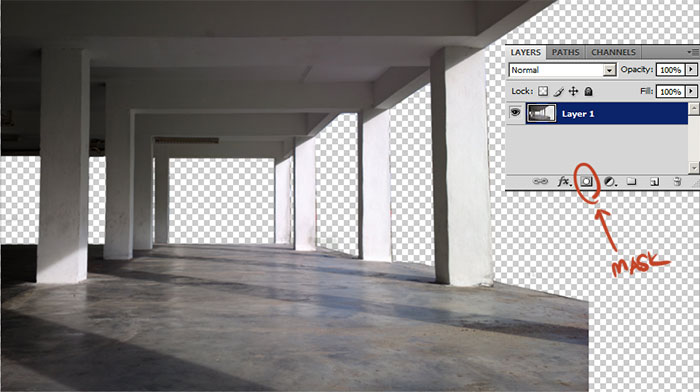
It is also better to use a mask to crop out the object instead of erasing the image directly. With mask, you can crop with brush(B) and eraser(E), instead of clicking undo all the time.
Since I just need the hallway in my artwork, so I only have one layer and I move it slightly to the left to give more space for background.
Wait! Do not just use random google photos. Check the copyright too!
Paint Over
After separating the hallway into it own layer, I added in the missing area with a hard round brush. Lock layer transparency (so you wont paint on transparent area) and start painting over the layer to give it a more painterly feel.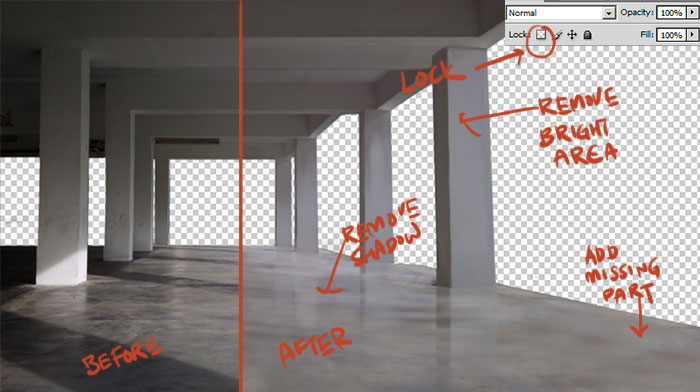
You can also apply the "remove noise" filter, to remove noise and image compression artifact from the photo. Just remember, the foto paint over process is an ongoing process and you will revisit this as you work on the image more.
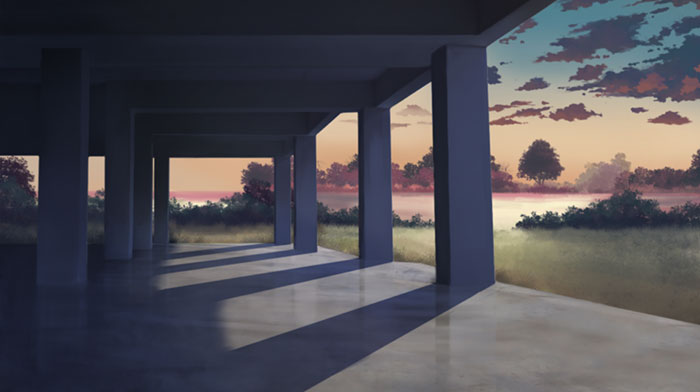
Sky
Add a new layer behind the hallway layer. Start painting the sky with a soft round edge brush. You can use the gradient tool as well, but I prefer painting it manually to give it a painting feel.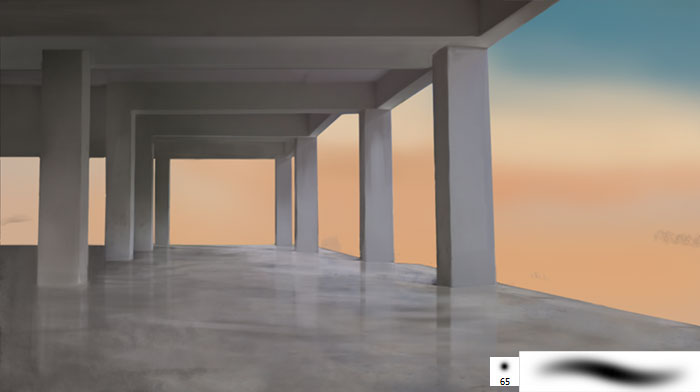
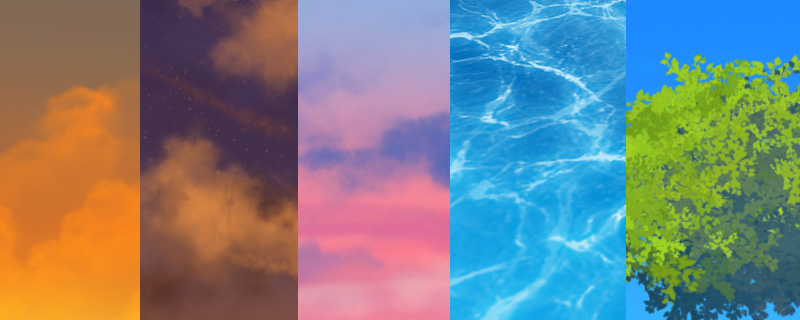
I strongly recommend use color reference for this step (unless you are already a pro, which in this case you shouldn't be reading this noob tutorial at all)
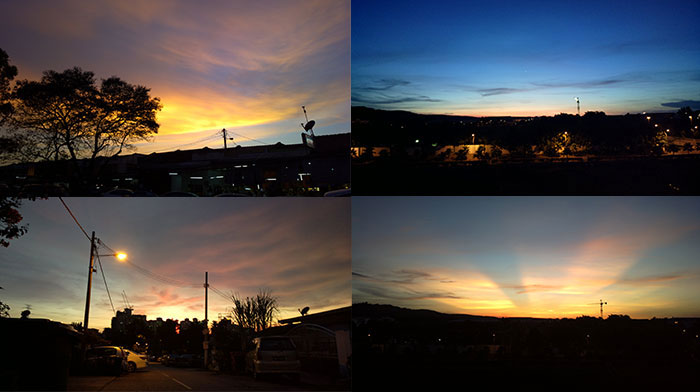
These are some photos I took with my camera phone. As you can see, the colors are already quite saturated and perfect for animation background.
Cloud
Painting clouds are not easy. Makoto Shinkai can use 2 or 3 seconds to paint a nice looking cloud, while we noob spend 2 hours on a cloud and it still look like crap. Of course we can cheat with pasting photo like how I did last time. But if we really want to improve, we will need to keep on painting.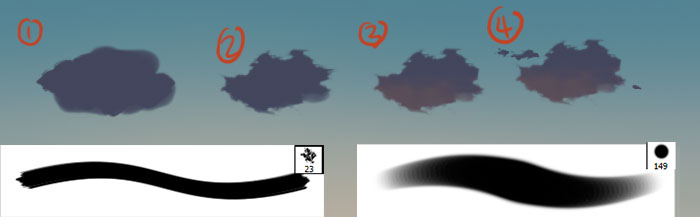
In my artwork, I use these two default brush from photoshop. Round brush with "other dynamic" on and "brush tip hardness" lower down. Use for drawing base cloud shape and blending. Chalk brush. Use for "erasing" part of the cloud.
- Draw a base cloud shape with the round brush.
- Delete part of the cloud with the chalk brush.
- Lock layer transparency. Lower down the round brush opacity and blend in another color.
- Use the round brush to paint the little cloud. Play with brush size jitter and scattering option as well.
Only with these two brush, we came out with a not so bad looking cloud. Imagine if you are using custom brush, the result will be even better!

The key of cloud painting is "randomness". Random in cloud shape and random in cloud placement, so it will look natural and not too organize or symmetry. Unfortunately, cloud painting is not something I had excel with. Probably we need to go out and look at the sky more =).
More Tutorial! You can read my other tutorials on anime cloud painting and look at the brush settings for painting anime cloud.
Shadow Layer
I want the shadow to be case from where we are looking at, so I add a new layer and start painting with light blue/cyan/purple (cold) color.
Put this layer on top of the hallway layer, and set the blend mode to "multiply". Now you can see why I remove the real shadow from the photo, else we going to end up with two different shadows casting in different direction.

Grass, Trees, Bushes
Painting trees, bushes are similar with painting cloud. The main differences are using different type of brush. The image above shown some of the custom brush I made. You should be able to create your own custom brush easily either by using photo or manually drawing the leaves shape. Remember to change the option for "Shape Dynamic", "Scattering" and "Jittering" too.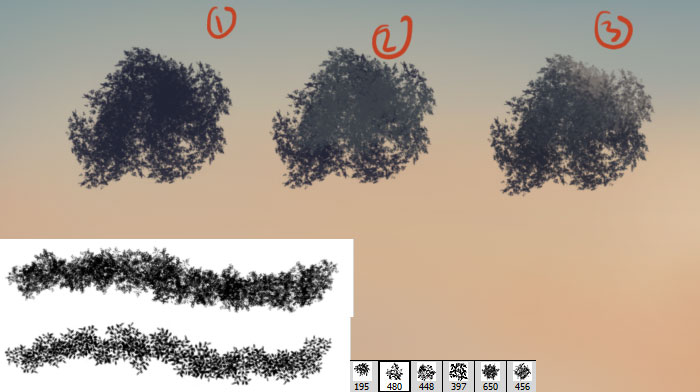
- Draw the base shape with the custom leaf brush.
- Lock layer transparency. Lower down the round brush opacity and blend in another color.
- Color pick the blended color and paint again.
With a custom "leaf/bush" look brush, you can paint all these quite fast. Remember to make use of layer too, so changes can be done on different object easily.
More Tutorial! You can read my other tutorials on anime tree painting or watch a timelapse video of me painting anime tree.
Distance Building
Distance building are quite easy to paint. Just make sure to use the transform function, and "SHIFT" key.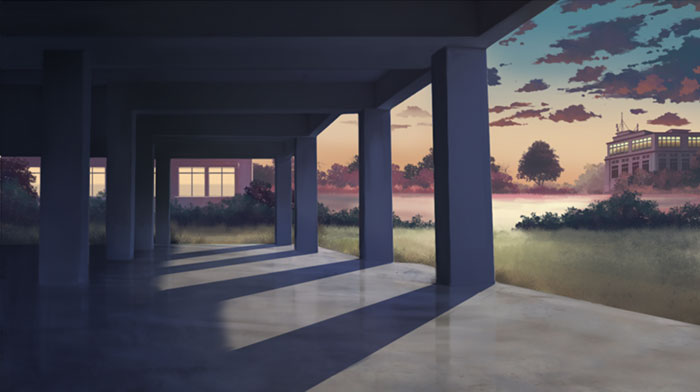
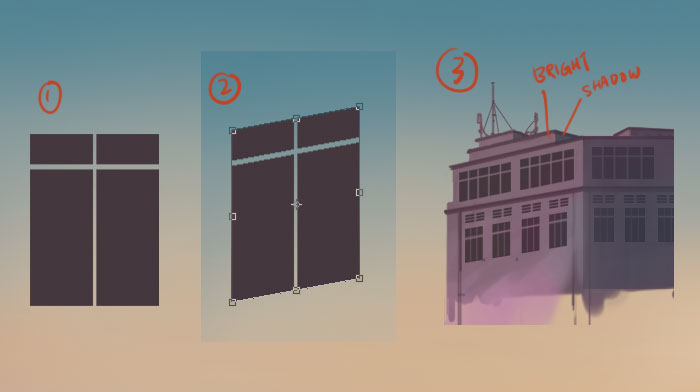
- Add new layer, draw the building details (window) in front view. Use "SHIFT" KEY to draw/erase in straight line.
- "CTRL T" to transform the shape into the perspective you want.
- Duplicate the shape layer and merge them to the building layer.
Another things to remember is, since distance objects are already locate far away, so the colors can be simplify into simple shades.
More Objects to The Scene
I want to populate the scene with more objects, so I open up Blender3D and render a few 3D models that I always use. This does not mean you need to learn 3D to do background art, you only need to have enough library/stocks of assets which you can reuse easily, and it can be in vector or 2D images.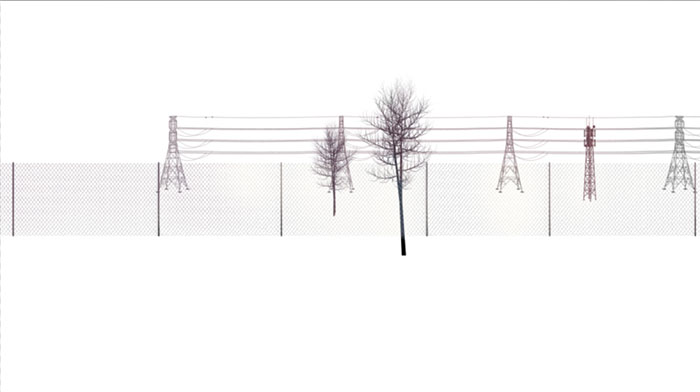
Atmospheric Effect
Atmospheric effects are essential to make your painting more belieavable. To add Mist. Use the soft round edge brush to paint the mist. Layer blending mode can be left as default/normal, as we dont want it to glow or darken the area.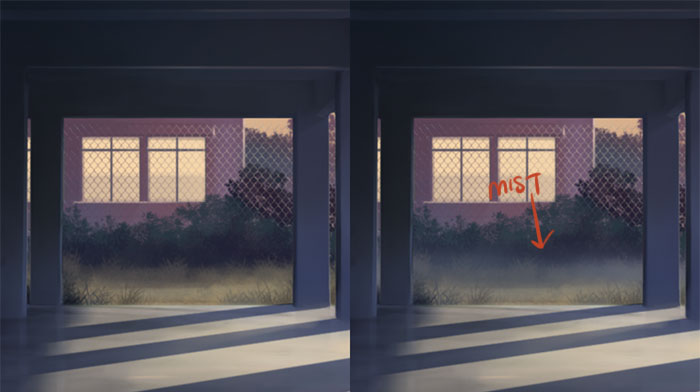
To add specular / light reflection. Draw some specular/highlight line along bevel area. Paint the floor with a warm color and set the blending mode to "screen", so it look like the floor are reflecting some lights from the sun.

To add glow effect. Add new layer, use the soft round edge brush to paint the glowing area (light source). Change the blending mode to addictive mode like "Screen" or "linear dodge(add)".
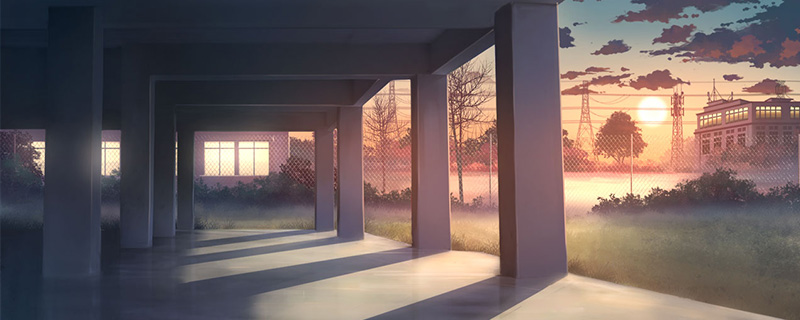
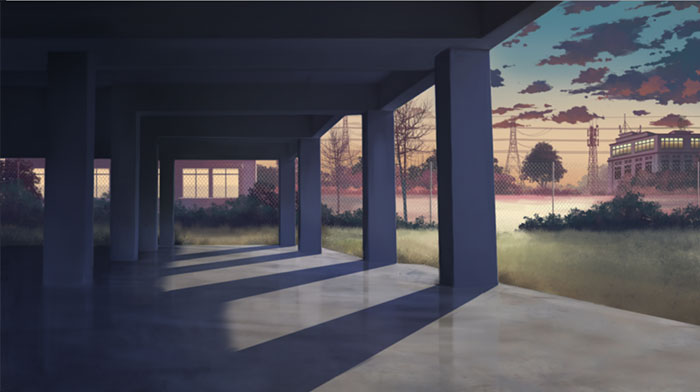
This is the final artwork which I spend the whole afternoon painting it.

Like this article/tutorial? Follow me on my Facebook page to get more updates.
awensome, i like this XD. thanksss >.<
ReplyDeleteThank you! This tutorial makes me couraged to try it. It is good tutorial for me.
ReplyDeleteThis is a really good tutorial, gave me a lot of good information.
ReplyDeleteIf I could I would share a little advice too. When you paint the bushes/plants in general, if you paint with a round brush starting out like your clouds; and then going around the edges of your shapes with your custom brush it will look more painterly.
Thanks again and awesome work!
it helps a lot, this kind of work is so beautiful and pretty cool, thanks.. again thanks for sharing :)
ReplyDeleteAwesome art, and a great explanation probably an inside look at anime.
ReplyDeleteThank you very much for the tutorial 😊😊
This is the best fucking tutorial I've seen in my life! Period.
ReplyDeleteThanks sooo much for this tutorial, I'm gonna try it out and see how I fair.
ReplyDeleteIt's the best tutorial on internet! We need more!
ReplyDeleteAwesome Tutorial .......
ReplyDeleteJ'adore
ReplyDeleteNot what I was thinking of. This is photoshop. I'm actually looking for a guide on how to draw an anime background completely from scratch without using any pieces from anything as bases.
ReplyDeleteExactly what I'm looking for as well and got this instead, but it's still
Deletegreat nonetheless
Love your work, keep creating !
ReplyDeleteBro, thanks, ur toturial make my day, i try to make backgrounds to my animation but i don't know how start
ReplyDeleteThis is a really great tutorial. Thank you for sharing this!
ReplyDeleteMuchas gracias por tu aportacion, me sirvio demasiado. Llevo meses queriendo impulsar mis conocimientos en animación y tu has hecho esto realidad. Gracias! Saludos desde México!
ReplyDeleteThanksss! it's very helpful
ReplyDeleteThis is really great! thank you!
ReplyDeleteYOU HAVE MY GRATITUDE
ReplyDelete