After Effects Vintage Terminal Console Text Effect With Blinking Cursor
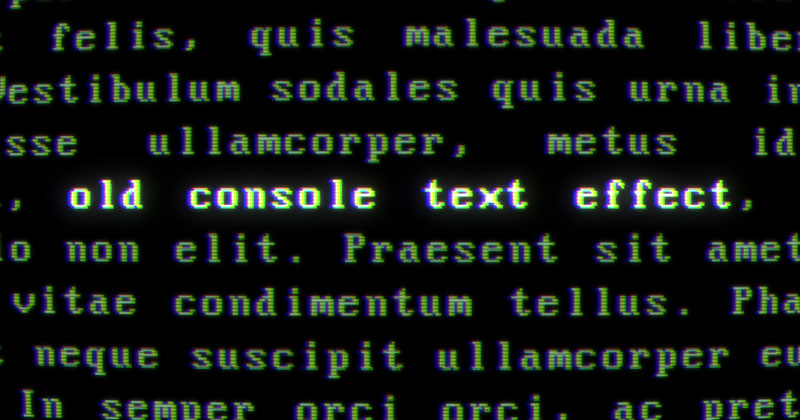
In this tutorial, I will show you how to create a typewriter effect with blinking cursor using After Effects. This can be use for old console or vintage terminal animations.
Important! This tutorial only work with font which have fix and standard width. Typewriter effects are animate manually without the use of expression. So, it might not be a good idea to use this for large body of texts.
1) Choosing The Correct Font
This tutorial only work with font which have fix and standard width. I am using a terminal style DOS font which you can download them from Perfect DOS VGA 437 by Zeh Fernando or More and Less Perfect DOS VGA by Laemeur.2) Creating The Text Layers
First, create two text layers. One for the text messages, and another one for the blinking cursor which I am using an underscore. I am putting the two layers in different positions so we could see them clearer in this tutorial, but you could leave them in the same position.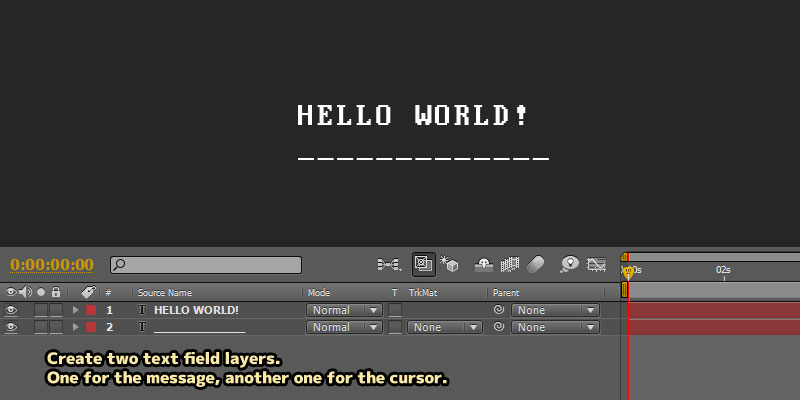
Total characters for the cursor layer should be more than the total characters in message layer. For example "Hello World!" contain 12 characters including blank space. So, the cursor layer will consist of 13 underscores, "_____________".
3) Adding Typewriter Animation Presets
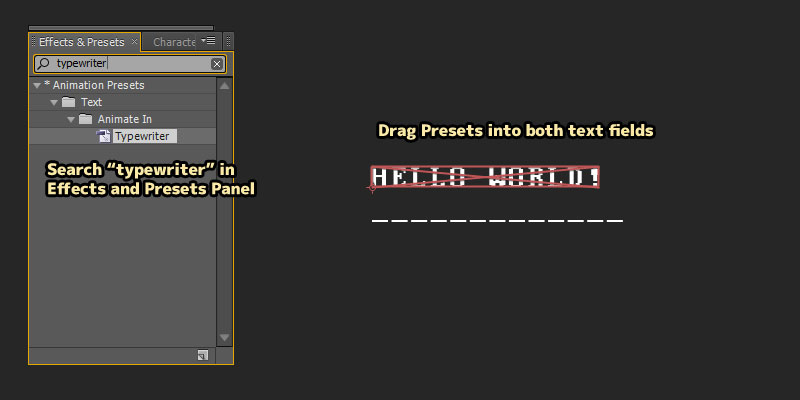
Under "Effects & Presets" panel, search for "typewriter". Drag the preset and drop it on both text layers.
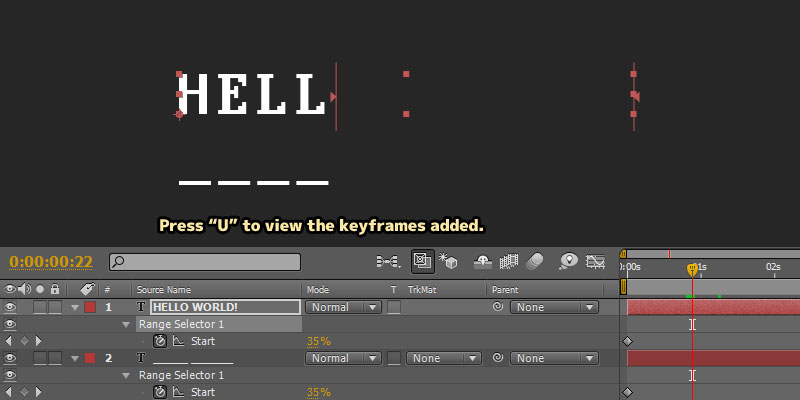
Press "U" to view the newly added keyframes. When we scrub through the timeline now, we will see both text layers are animate in a way that they were being type out. But the cursor layers are not animate in a way that we want, which is staying the end of the text.
4) "Animating" The Cursor Position
Under the cursor layer, expand the properties panel for "Text > Animator 1 > Range Selector 1".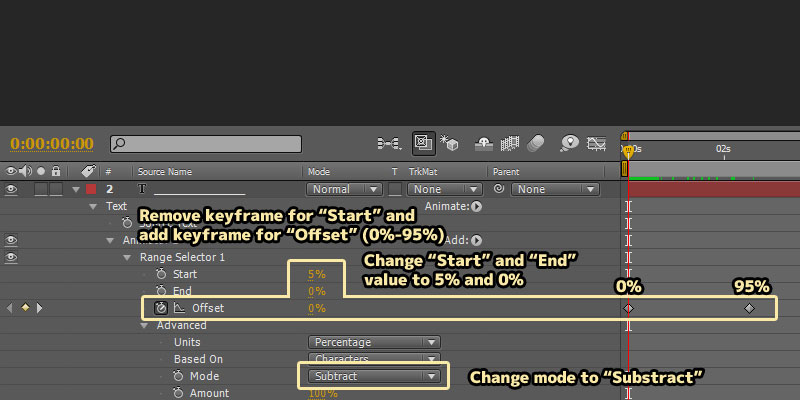
- Remove keyframe for "Start" property.
- Change "Start" value to around 5% and "End" value to 0%.
- Add keyframes for "Offset" property, set the keyframe value from 0% to around 95% (value varries depend on length of text). It is important that the duration for this keyframes is the same with the "Hello World" message layer.
- Under "Advance", change "Mode" to "Substract".
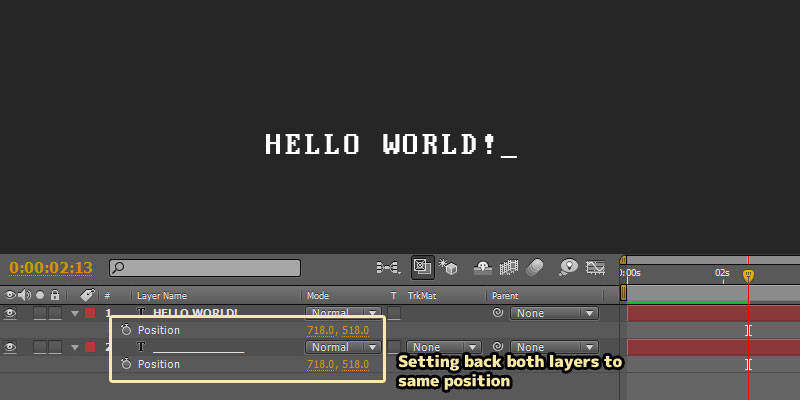
After you had done, press "P" to show the position properties and move both text layers into the same position. Parent the cursor layer to the text message layer, so we can move them around easier next time.
5) Cursor Blinking Loop
For cursor blinking animation, we need to animate its opacity value. Press "T" to view "Opacity" property.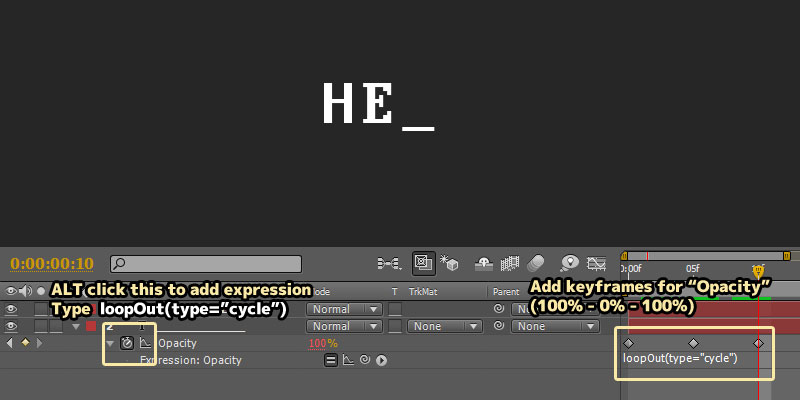
- Add three keyframes for "Opacity" property, set the keyframe value from 100% to 0% and back to 100%.
- ALT-Click on the stopwatch icon, type loopOut(type="cycle") for the expression. This will make the blinking animation continuos/cyclic.
6) Chromatic Aberration / Colour Shift Glitch
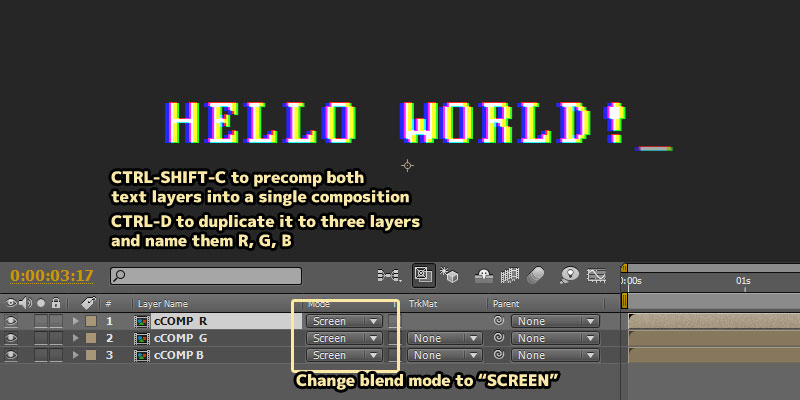
- Select both text and cursor layers, press CTRL-SHIFT-C to precomp both layers into a single composition.
- Select the new comp, CTRL-D to duplicate them into three compositions. Name them R, G and B.
- Set the blend mode for all three layers to "Screen". If you can't see them in your panel, press "F4".
- Move all the layers slightly into different position (2 to 3 pixels).
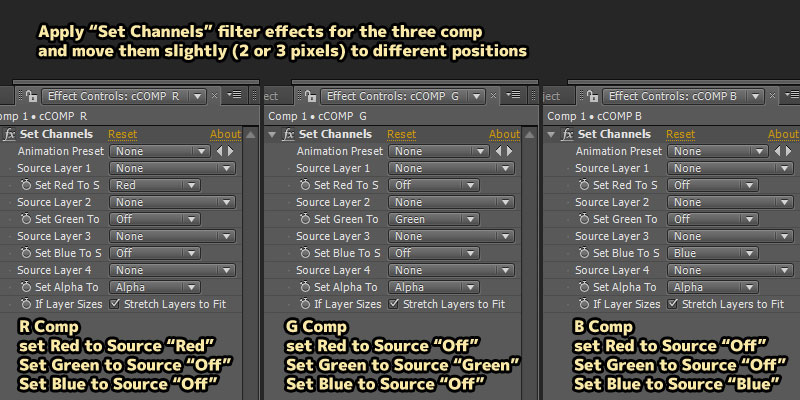
- Apply "Set Channels" effects for all the three composition layers.
- In R comp, set Red To Source to "Red", set Green To Source to "Off", set Blue To Source to "Off".
- In G comp, set Red To Source to "Off", set Green To Source to "Green", set Blue To Source to "Off".
- In B comp, set Red To Source to "Off", set Green To Source to "Off", set Blue To Source to "Blue".
6) Scanline / Lens Distortion / Glow
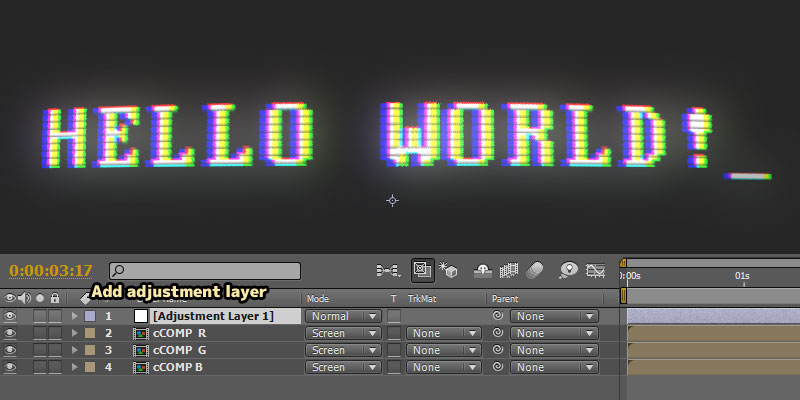
Add an "adjustment layer" above the three layers.
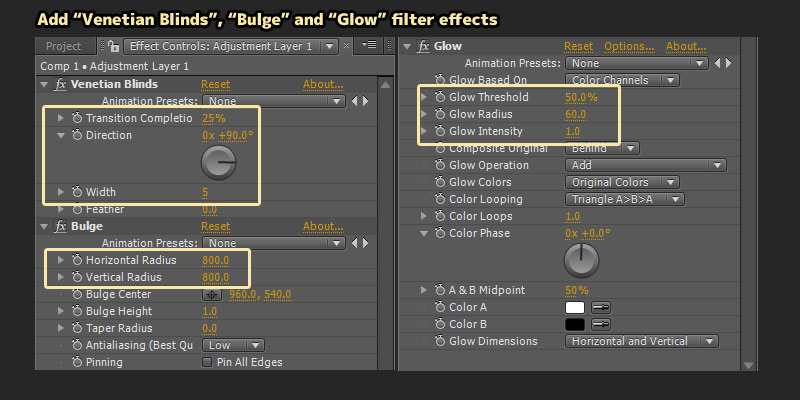
- For scanline effects, apply "Venetian Blinds" effects and set "Transition Completion" to around 25% and "Direction" to 90.
- For lens distortion effects, apply "Bulge" effects and set a big value for both "Horizontal" and "Vertical Radius".
- For glow effects, apply "Glow" effects.


awesome!
ReplyDelete
ReplyDeletehello Mclelun , I follow you from Italy, I really admire the work you do on this site and I find extremely useful and accurate your tutorials, keep it up!
Thanks for the tutorial. If you place the underline text layer directly underneath the main text layer, you can use this expression with the "Source Text" attribute to automatically generate the underscores, matching the number of characters in the main text layer:
ReplyDeleten = thisComp.layer(index-1).text.sourceText.length;
i = 0; t="";
while (i < n) { t +="_"; i++; }
t;