Photoshop Starfield Starry Night Tutorial
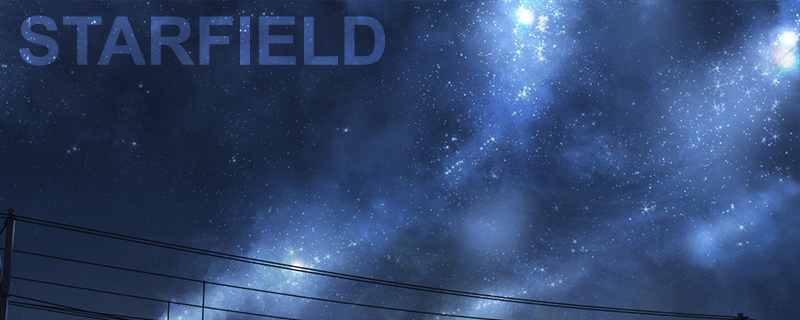
In this tutorial, I will show you how to paint starfield by using a custom brush and also a quick way to "generate" starfield in Photoshop by using noise.
First, lets create a custom stars brush for Photoshop. These are the steps on how to create star brush in Photoshop.
Brush Tip

Draw the brush tip shape with random dotted pattern.
Define Brush Preset
Convert the image we draw by using, Edit > Define Brush Preset.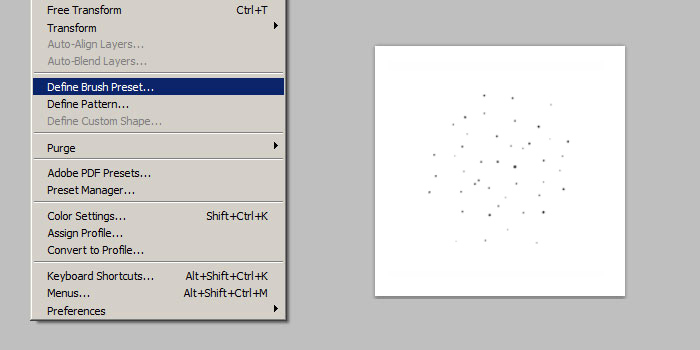
Shape Dynamic and Scattering
Now, select the new brush we just created. The brush currently is without any settings, so enable Shape Dynamics and Scattering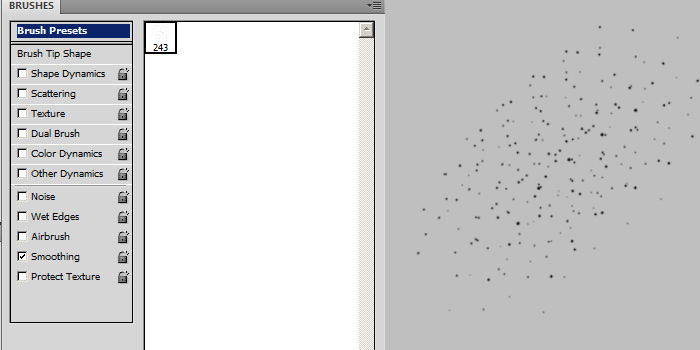
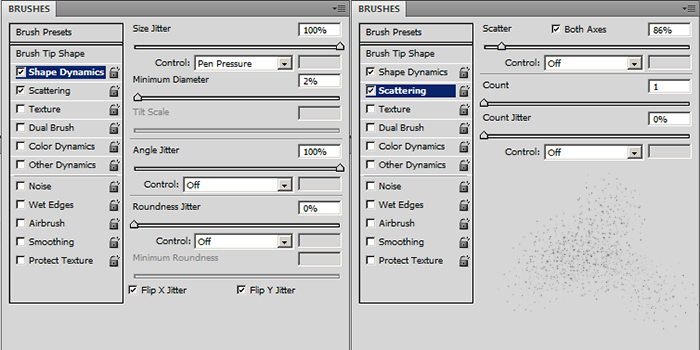
Shape Dyamics
- Size Jitter - Randomise brush tip size. Control with Pen Pressure.
- Minimum Diameter - Minimum brush tip size.
- Angle Jitter - Randomly rotate brush tip.
- Flip X Jitter - Randomly fliping brush tip in X axis.
- Flip Y Jitter - Randomly fliping brush tip in Y axis.
Scattering
- Scatter - Randomise brush tip location. Enable Both Axes so it scatter on X and Y axis.
- Count - Number of brush tip scatter. Default 1 is good enough
Saving The Brush Settings
After changing all the brush settings, we will need to save it again via New Brush Preset in the brush panel. If we don't do this, we will lose all the settings! Then under the brush panel again, choose Save Brushes to backup your whole set of brush.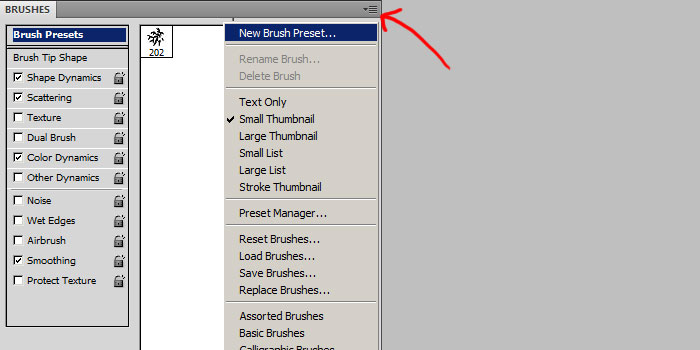
To quickly delete the brush without settings, ALT-CLICK on it.
Painting The Starfield
With the custom star brush created, lets paint some starfield!
Add a new layer, and paint the sky color with photoshop soft edge round brush.
Generating Starfield With Noise
Now, lets generate some distance stars using noise filter.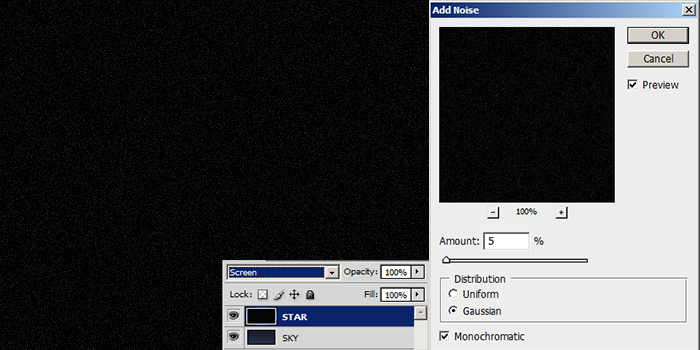
- Add A new layer and fill it with black colour.
- Go to Filter > Add Noise.
- Change amount to 5% and set monochromatic
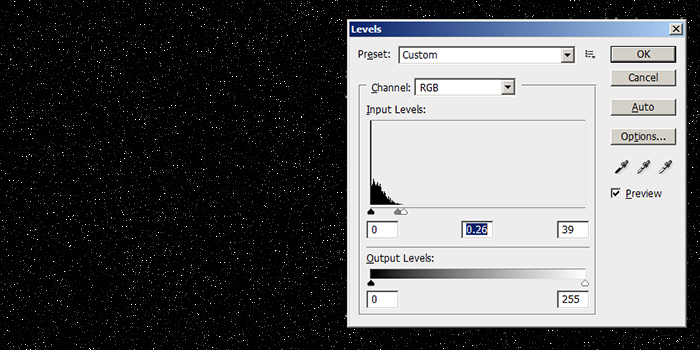
- CTRL-L to bring up the Level Adjustment.
- Adjust the levels so some noise are bright and some are dim. Refer to image above.
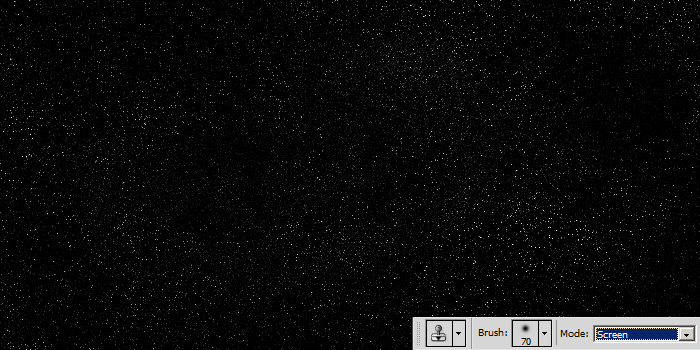
- To add more stars, use a soft edge round brush for clone stamp tool (screen mode)
- To remove stars, use eraser tool
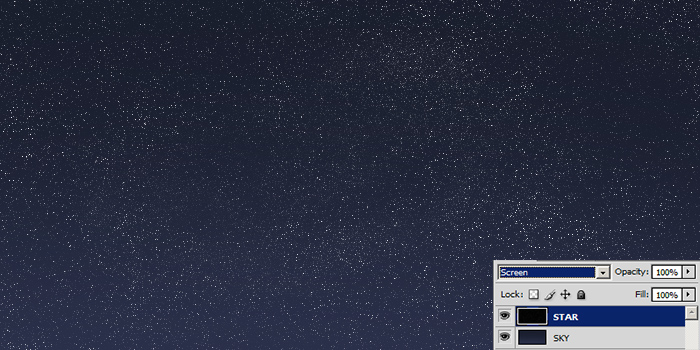
After you are done adjusting the star layer, set its blending mode to screen and it will look something similar to this.
Painting More Stars
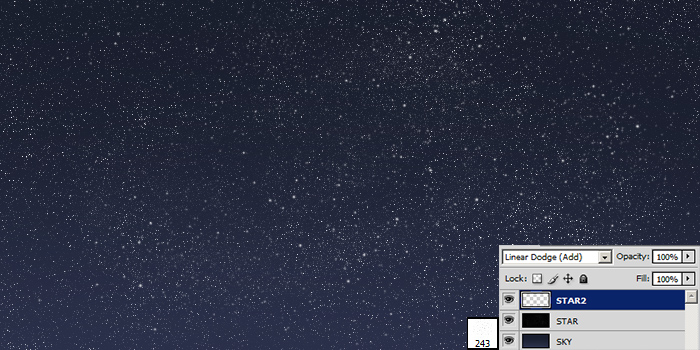
Add a layer with screen or add blending mode. Then use the star brush we created earlier to add more stars in the scene. I usually use the brush for bigger stars.
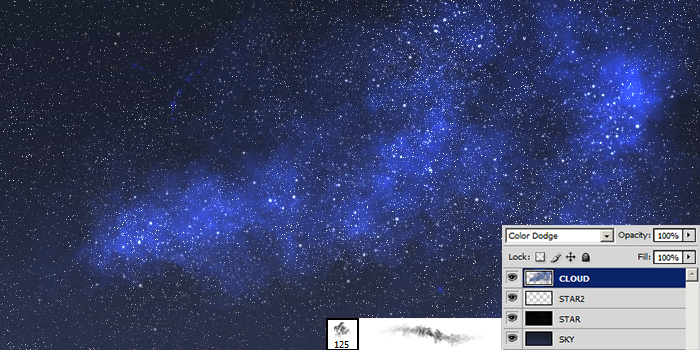
Add a layer with color dodge blending mode and use a cloud brush to paint some nebula. You can download custom cloud brush in my brush list page.
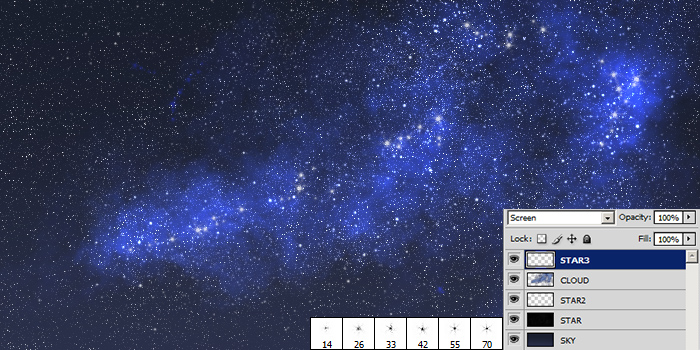
Add a layer with screen or add blending mode. Use those default photoshop star brush to add more stars around the nebula.
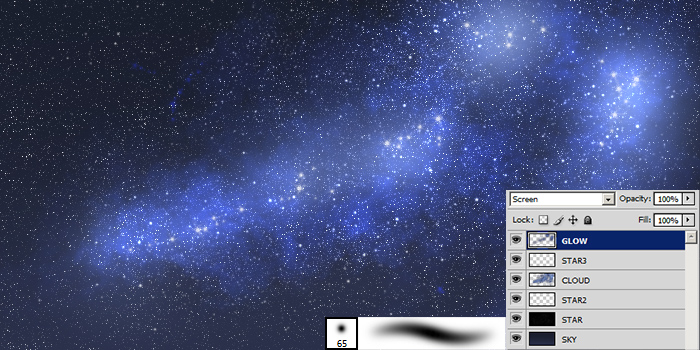
Last, add another layer with screen blending mode. Use photoshop soft edge round brush to paint some glowing effect near the nebula.
Video
Below is a timelapse video on painting starfield. The painting process took around 40 minutes, but the railway was model and render earlier.Artwork
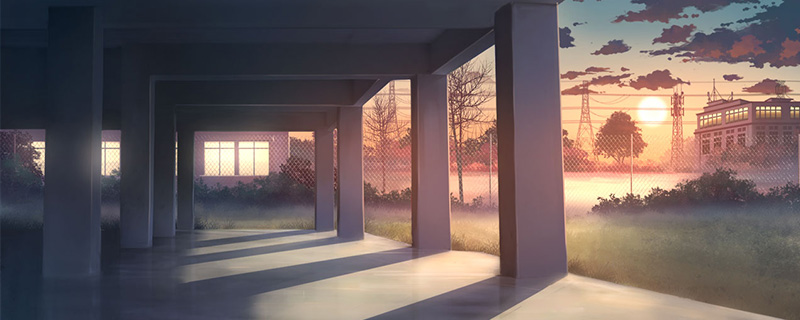
Some of my artworks which use similar method to paint starry night and starfield.


Reference
DeviantArt Starry NightPixiv Starry Night
Youtube Photoshop Painting Starry Night
Comments
Post a Comment